It’s that time of year again when the calendar points to a change of season. The days are getting shorter and the nights are getting cooler. Early fall is the time when your summer plants are in full bloom, but they eventually start to fade and look a little drab as the days march on. Now is the time to consider some fall flower gardening ideas, in particular, adding beautiful autumn flowers to your space. The most popular flower displayed in fall gardens are Chrysanthemums, frequently referred to as “mums”.
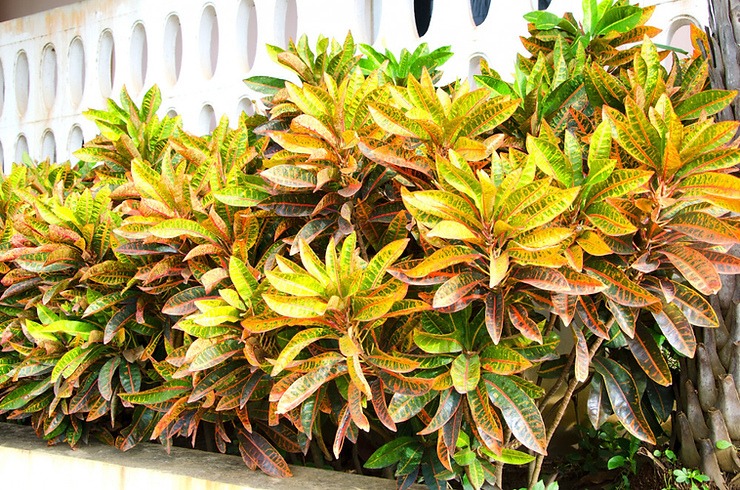
But have you ever considered a Croton plant? These beautiful, fall-colored plants are native to tropical forests in Oceania and southern Asia, but you can grow them in your own yard if you live in a tropical or sub-tropical region. Southern and central Florida in the US are perfect for growing Crotons outside. These non-flowering beauties can also be kept on display outside in a colorful pot and then brought inside for the winter. Read on to learn how to plant a Croton and how to care for it both inside and out.
(Some of the links within this post are affiliate links on which I receive a small compensation from the sale of certain items with no extra cost to you.)
(As an Amazon Associate I earn from qualifying purchases.)
Planting a Croton in the Ground – Sub Tropical Zones
Croton/ (Codiaeum variegatum)
If you live in areas where you experience no frost or temperatures even close to freezing, you can plant Crotons in the ground. These areas include USDA zones 9 through 11. This branchy, bushy shrub can grow up to 10 feet tall depending on the variety. Read the tag carefully when purchasing the plant. Many Crotons that are on display at your local home store in the fall are of the smaller variety. Pair them with coleus, canna, celosia, lantana, angelonia, and/or marigolds for a beautiful display.
Planting Tip
A general rule of thumb is to plant your tallest plants in the back and continue forward to the smallest in the front.
Soil
Crotons grow best in rich, organic, well-draining soil that is slightly acidic. Plant the crown of the plant level with the soil and add organic mulch around the base of the plant but not touching the stem.
Light
Crotons will supply you with vivid colors if they are planted in full to indirect sunlight. The amount of sunlight the plant receives correlates to the brightness of its leaves. Some varieties do grow well in partial shade so be sure to read the tag when purchasing Crotons.
Water
Crotons grow well with moist, but not soggy, soil. Water your plant every 3 to 7 days depending on drought conditions. If the top 1/2 inch of soil is dry, water it. Use your finger to determine whether or not it needs watering.
Fertilizer
Fertilize the Croton once in late February to early March when the growing season begins, again in late May, and one time in mid-July. Use a small amount of liquid or granular fertilizer that is higher in nitrogen and potassium with much less phosphorous. NPK is the acronym you’ll see on fertilizers, which stands for Nitrogen, Phosphorus, Potassium. You want a lower-middle number, which indicates less phosphorus. Some good ratios for Croton fertilizer are 3-1-2, 8-2-10.
You do not want to overfertilize a Croton because it could cause dull leaf color, loss of leaves, or stunted plant growth. Over fertilizing of any kind with a synthetic chemical can also lead to soil degradation.
For more information on how to promote healthy soil, read “How to Save Our Soil”.
Instead of adding a store bought fertilizer, opt for adding organic compost spread along the surface of the soil with a one foot radius from the stem. For more information on composting, click “Easiest Way to Compost”.
===<Purchase a Croton Plant From Etsy>===
Using Crotons for Fall Decoration and Indoors
Toxicity
As with all indoor plants, if you have fur babies, check to see if your plants are non-poisonous. Crotons are toxic to both cats and dogs. If your furry friend ingests any of this plant, bring him or her to a veterinarian immediately, along with a sample of the plant he/she has ingested. For more information about indoor plants and pets, click “All About Indoor Plants”.
Repotting
After purchasing any ornamental shrub, plant, or flower from the store, repot them into a suitable sized container, one that is an inch wider than the one you bought it in and that has good drainage. Do not go more than 2 inches larger because the plant will expend more energy on growing roots rather than pushing the plant upward. Plus, Crotons do not like to be disturbed.
After the initial repotting, only replant your Croton if you see roots growing out of the bottom of the pot and/or the water streams immediately out of the container after watering. This indicates the roots are bound up in the pot and need a little more space to spread their feet and more nutrients and minerals.
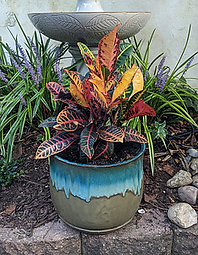
Choose a complementary container which can be store bought or found at yard sales that are prevalent this time of year. I highly recommend yard sales or flea markets because they are generally cheaper than stores and you are saving landfills by repurposing the container.
Soil
Use a soil with a good balance of water retention and drainage, sufficient nutrients, and proper aeration. A soil with organic compost and peat moss is a good choice. One product is Croton Plant Potting Mix Soil sold at Amazon.
Temperature Change
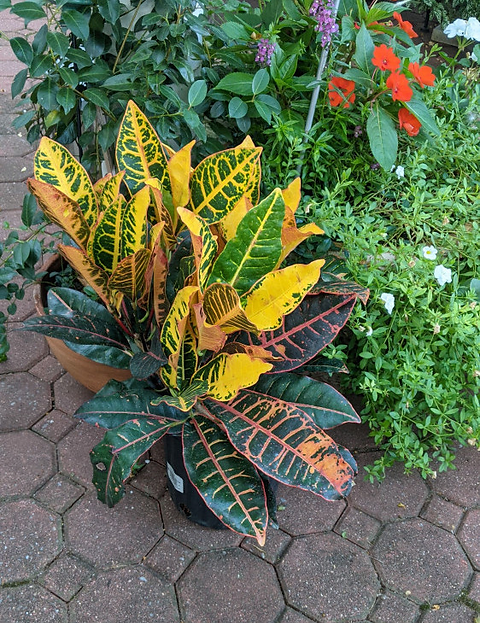
The Croton can stay outside on a patio or porch with high light until temperatures dip close to freezing. You do not want the plant to remain outside if you receive a frost warning or expect freezing temperatures. It’s best to bring the plant inside a couple weeks before you turn on the heat in your home so it can get acclimated to the indoor environment.
Once your plant is brought inside it may drop a few leaves. Don’t fret. With proper care it will stabilize in about 3 to 4 weeks and begin pushing new leaves.
Sunlight
A Croton plant will only thrive inside if it is in a room with a lot of bright sunlight. If you do not have sufficient sunlight, this plant will not fare well. As is the case when in the ground, a Croton in a pot needs enough both direct and indirect sunlight to promote healthy and vivid color.
Water
Keep your plant moist but not soggy. Use the finger tip test by dipping your finger into the soil an inch or so. If the soil is dry on the top half inch, it is time to give your plant a thorough watering until water seeps from the bottom drainage hole.
Humidity
Since a Croton is naturally tropical, it loves a humid environment. Place it in a grouping with other plants which will collectively release moisture into the air. As an alternative, you could place it in a sunny, warm, and steamy bathroom.
One other option to create humidity is placing the pot on top of a tray filled with a layer of pebbles. Fill the tray with water but do not place the entire pot into the depth of the tray. The bottom of the pot should not touch the water. The water eventually evaporates and rises to the plant, blanketing it in a bubble of humidity. Check the water level in the tray every week or so and add more water as needed.
A spray mister bottle (found on Amazon) is also good for adding humidity to Crotons and to epiphytes such as Orchids.
Fertilizer
Do not fertilize your plant for 6 months after repotting. This will help the plant’s roots acclimate to its new environment. Once established, fertilize your plant every 2 months during the spring and summer seasons using a good tropical plant or indoor plant fertilizer. See above for a recommendation of a good NPK fertilizer. Do not fertilize a Croton in the fall or winter when it is dormant.
Best Growing Conditions
Crotons are sensitive to temperature and light change. Do not place them next to drafts or vents. A south facing window with lots of natural light or a west facing window with long lasting light is best for your plant. If the color of the Croton begins to fade, move it to an area where it receives more light.
New growth will start green, then gradually turn to shades of yellow, red, or orange.
Place your plant where the temperature is consistently warm. This may be difficult to achieve, especially in the winter when temperatures dip at night in a home. As I noted above, you may get a bit of leaf drop if the temperature and light are not correct. Again, all is not lost. It may just take some time for the plant to get accustomed to its new environment.
Varieties of Croton Plants
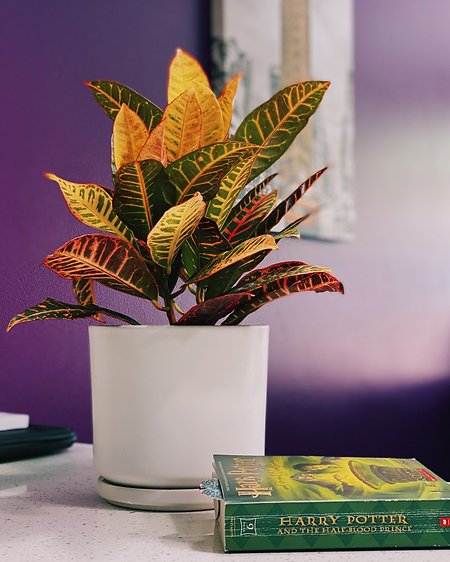
There are over 100 varieties of Croton plants. In each kind, the leaf shape and color may vary. According to Wisconsin Horticulture, “the shiny, alternate leaves may be linear to oval, have a smooth or lobed margin (sometimes deeply cut to the midrib), and some are wavy or twisted into a spiral”.
They also produce different bright and varicolored leaves. The colors are the essence of autumn. Beautiful red, yellow, green, copper, orange, brown, pink and ivory leaves make this plant a perfect selection for fall foliage.
Some popular varieties include:
Codiaeum variegatum ‘Gold Dust’
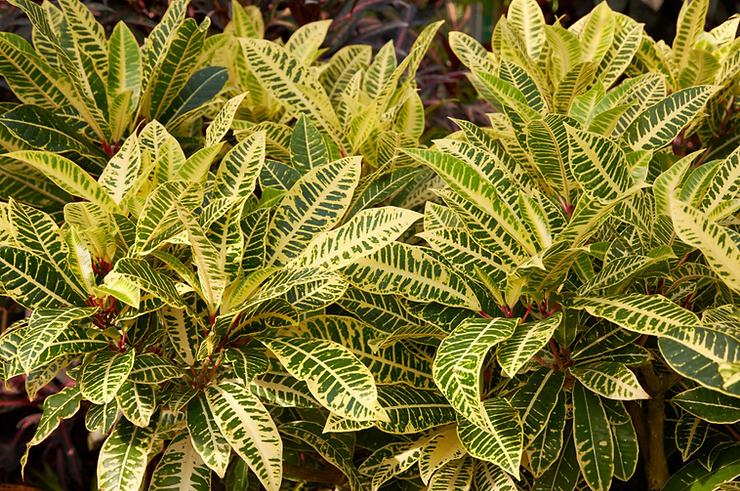
A low maintenance, slow growing, evergreen that can grow from 3 to 6 feet tall.
Codiaeum variegatum ‘Red Iceton’
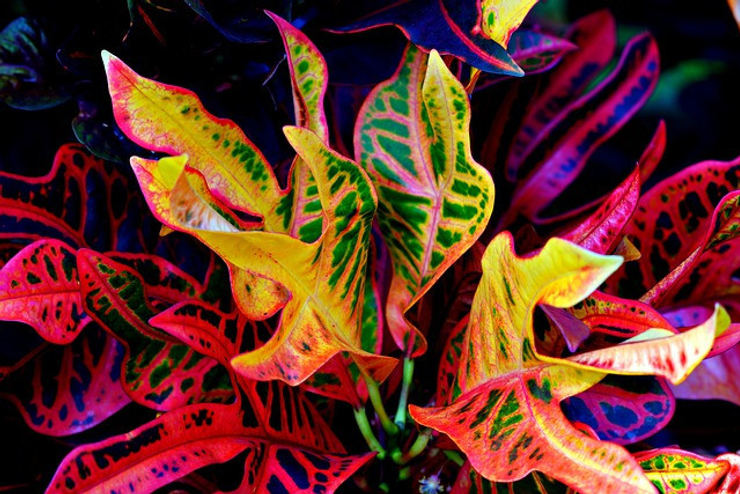
A display of green, gold, orange and deep burgundy red veins make this variety an unusual choice. It can grow to 20 feet outside.
Codiaeum variegatum ‘Magnificent’
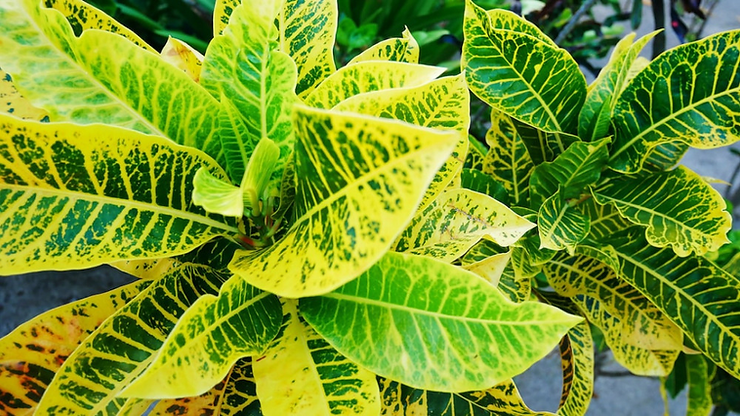
This variety is similar to Gold Dust but usually grows to 3 or 4 feet tall. It keeps its color even in the shade.
How to Propagate Croton Plants
This plant is super easy to propagate (create more plants from a leaf).
- Fill a clean jar with fresh warm water.
- Cut a stem from the mother plant with 3 to 5 leaves on it.
- Place the stem, not the leaves, in the jar in a warm sunny location away from drafts.
- Keep the water level high enough to cover the stem.
- In a few weeks you’ll see roots growing.
- When the roots are about 3 to 5 inches long, plant the plant in good, well-drained potting soil and care for it as described above.
Fall Flower Gardening Ideas – A Croton
Yes, Croton plants can be a little fussy. But if you provide the proper amount of sunlight, water and good, well-drained soil, you will enjoy the beautiful shades of autumn in just one plant! I hope you enjoyed this post. Please leave a comment below and share this post with friends and family.
Happy Gardening!
Nina
bestgardeningforbeginners@gmail.com

