How to Grow Ginger Root – An International Herb
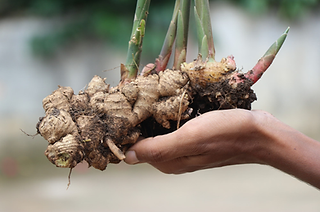
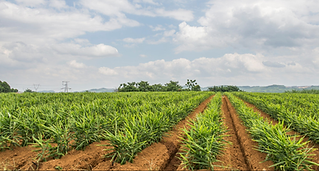
One staple of Asian culinary dishes is ginger. It is widely used in southeast Asia in countries such as China, South Vietnam, South Korea, India, Taiwan, and even as far east as Japan. It originated in Maritime Southeast Asia and was then domesticated and transported throughout the Indo-Pacific region.
Ginger was one of the first spices to be transported through the spice trade to Europe. There are many varieties of ginger plants. Most ornamental varieties are grown for their beautiful flowers. However, there is one specific variety used in most all culinary dishes. This variety is the Zingiber officinale. Learn how to grow ginger root using roots purchased from organic grocery stores. It is quite the international herb!
(Some of the links within this post are affiliate links on which I receive a small compensation from the sale of certain items.)
(As an Amazon Associate I earn from qualifying purchases.)
How to Grow Ginger Root In a Pot
It is a misnomer to say ginger root. Ginger does not have a root. It has a rhizome. That is the part of the plant that is used in culinary dishes. However, we have been programmed through the years to call it a root, and I will refer to it as a root throughout this post.
It is quite simple to grow your own ginger plant at home. For an easier germination process, choose irradiated ginger from an organic food store. The store variety that is frequently purchased is Zingiber officinale. Most supermarkets stock ginger root to which ionizing radiation has been applied. This deters the germination process and is not harmful to the plant or consumers.
According to the United States Food and Drug Administration, “Food irradiation (the application of ionizing radiation to food) is a technology that improves the safety and extends the shelf life of foods by reducing or eliminating microorganisms and insects”. It also inhibits and delays the sprouting and ripening of fruit to extend its longevity.
Organic markets do not purchase produce that has been irradiated. If the product is labeled organic and has the USDA certified organic label on it, it will not be irradiated.
Find an Organic Ginger Root
Choose ginger roots from the store that have many nodules (bumps similar to potato “eyes”) approximately 2 to 3 inches long. These roots are referred to as seeds.
Select plump, full-bodied chunks that are not withered and whose skins on the buds are lighter in color and thinner. Do not choose pieces with darkened buds.
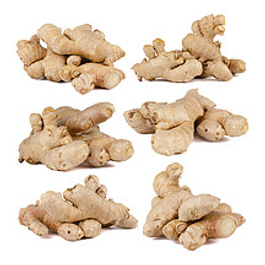
Purchase organic ginger from Etsy.
Encourage Germination
Break the ginger rhizomes into pieces allowing at least 2 nodules on each piece.
Soak the pieces in water for approximately 12 hours to encourage germination and to awaken them from their dormancy.
Prepare the Soil
Combine rich, loamy, well-drained soil and 50% compost such as Vermicompost (a decomposition of specific worms purchased through Amazon), decomposed cow dung or peat moss.
Prepare the Container
You can use a plastic takeout container with a clear lid as a terrarium to help the rhizomes sprout. Make sure you punch many holes in the bottom of the container for good drainage. If the rhizomes get waterlogged, they will die. Place a piece of burlap or newsprint in the bottom of the container before adding the soil. This will retain some of the water and prevent soil from seeping through the holes.
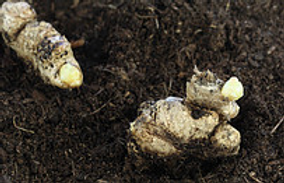
Plant the Seeds (Rhizomes)
Fill the container with 1 to 2 inches of potting soil. Add the seeds with the nodules pointing up, and cover them with another one inch of soil. Water well. Replace the cover but do not seal the cover.
Where to Place the Seeds and How to Water
Place the container with the rhizomes on a window sill where the temperature will be maintained at about 70 degrees Fahrenheit (21.1 degrees Celsius).
Keep the soil moist but not soggy.
How Long to Germinate
You have to be patient when propagating ginger root. It will take from 5 to 8 weeks for a sprout to emerge and grow large enough to be transplanted into a larger container.
Transplanting into a Larger Container
Once the plant is around a foot high, gently tip the plastic container over, lift out the soil, roots, and plants and pull them apart into separate plants.

Fill a large pot (at least 10 inches deep and 10 inches wide) that has several drainage holes with the same soil you used to germinate the original rhizome. You can add a little coconut coir (pronounced COY-er purchased through Amazon) to improve air porosity. Air porosity refers to the permeability of air and water, both of which the plant needs to survive. The coir helps create air pockets and assists with water retention. Do not use any more than 40% coir in the pot.
Add the ginger plants to at least 4 inches of soil and cover them up to the beginning of the stems.
Ginger plants can grow from 3 to 4 feet tall.
Where to Place the Container
Place your pot in a warm sunny window in the winter. Move it outdoors in a sheltered area away from direct sunlight and wind when temperatures range between 60 and 90 degrees Fahrenheit (15.5 to 32.2 degrees Celsius). Ginger prefers partially shaded areas.
Once you bring the plant indoors when the temperatures drop, place them in a south facing window.
Fertilizer
Fertilize your ginger plant weekly with a good water soluble fertilizer.
Hilling the Soil and Watering Regiment
Ginger rhizomes grow vigorously. They will burst from the soil and turn green. To prevent this from happening, sprinkle several inches of compost soil on top of them every month. This is referred to as “hilling” the soil.
Keep the soil moist but not soggy, watering once per week or when the soil feels dry to the touch.
Harvesting Ginger Root
It will take up to 10 months for the plant to mature.
While holding onto the greens at the base of the plant, gently pull out the mature plant from the soil. Snap off a portion of the rhizome and then return the plant back to the pot.
Gently pat the plant in the soil and cover it with more compost or potting soil. Take care of the plant while it is recovering by placing it in indirect light and water it well. Also, maintain a steady temperature of around 70 degrees Fahrenheit.
Different Ways to Use Ginger
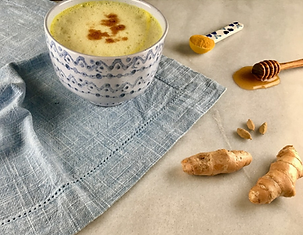
Once you harvest ginger try using it in these culinary ways.
1. Candied
Cook pieces of ginger with sugar until it is softened. Use candied ginger in biscuits and cakes. It can also be used as a lozenge for a sore throat.
2. Chutney
Either use fresh, dried or powdered ginger in a chutney to create a fresh, aromatic flavor.
3. Marinade
Blend ginger, garlic, salt and chili seasoning to make a paste. Rub it on meat and allow it to marinate for a few hours. It permeates the meat and adds a lovely flavor.
4. Chai Masala
This Indian tea has become more popular recently. Boil black tea (Purchase from Etsy) with milk and water. Lightly pound fresh ginger and brew with hot water, black pepper, cloves, cardamom, dried ginger and cinnamon.
5. Cleanse the Palette
Eat dried and pickled ginger between meals or after eating a meal to freshen your palette. This is a common practice in Japan.
Purchase pickled ginger from Etsy
Final Thoughts – How to Grow Ginger Root
Ginger is an easy herb to grow. Purchase an organic piece with many nodules. Place it in water to expedite germination. Plant it in 2 to 3 inches of loamy rich soil in a well drained container.
Separate the plants once the shoots have reached 1 to 1 and a half feet. Transplant them into a large container and harvest the rhizome after 8 to 10 months.
Now that you know how to grow ginger, what are you waiting for?

