
Epiphytic Plants – Display a Bromeliad on Driftwood
An epiphyte is a plant that grows on the surface of something for support. Certain bromeliads are epiphytes and are relatively easy to grow. This family of plants include tillandsia, vriesea, neoregelia, and guzmania. In the wild they cling to tree trunks, bushes, rocks, and even cacti. Certain bromeliads are unique in that they do not need a pot or soil in which to grow.
Since most bromeliads are tropical, you can put them outside in the summer and bring them in for the winter as long as your summers are warm enough. Mounting bromeliads on driftwood is an easy way to bring nature into your home. Read on to learn about epiphytic plants and how to display a bromeliad on driftwood.
“Some of the links within this post are affiliate links on which I receive a small compensation from the sale of certain items with no extra cost to you.”
“As an Amazon Associate I earn from qualifying purchases.”
How Epiphytic Plants are Spread in the Wild
The seeds of bromeliads are spread by birds and mammals. They either pick up the seeds in their mouths and then drop them or they are spread by the animals’ waste.
If the seed lands in a crook of a tree limb or any other crevice where there is moss, lichen, or other natural debris, the seed is likely to germinate.
It attaches its roots onto the limb and debris and will continue to grow and thrive drawing nutrition from rainwater, dew, mist, air, and other natural debris that falls in the wild.
Specific bromeliads absorb nutrients through their leaves rather than their roots. The leaves have special scales called trichomes which aid in gathering nutrients from the water and air.
Their roots are used as anchors.
For more on epiphytes, click What is an Epiphyte?
How to Grow Bromeliads in Your Home
Follow these instructions to simulate an environment in which to grow bromeliads.
There are many varieties of bromeliads. Some require more humidity than others. Therefore, it is advisable to research the type of bromeliad you have purchased in order to supply it with the perfect blend of water and nutrients.
There are numerous ways to house your bromeliads. Generally they are anchored by their roots to driftwood, non-treated wood such as juniper and cedar, or placed in large terrariums, glass globes or open shells. The glass, terrarium, and shell forms of homes are better suited for genus tillandsia, otherwise known as air plants.
Another option is to anchor them to an object covered with sphagnum moss or place them in hanging baskets filled with bark. Unlike bromeliads, tillandsias can also be placed in crevices of houseplants or in a small cup filled with lava rock.
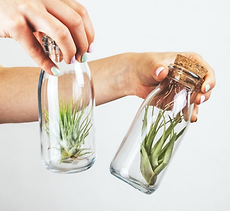
Tillandsia in Terrariums, Glass Globes or Oval Shells
Tillandsia are different from ordinary Bromeliads in that they do not like to grow in a medium.
If you choose to purchase a tillandsia, soak it in water for 20 to 30 minutes once it arrives home. Then gently shake out the excess water and place it upside down to dry. This will plump it up and make it very happy. Take note as to how it looks when it is “happy”.
Allow your plant to dry almost completely before placing it in an enclosure.
Terrariums
If you choose to place them in terrariums or enclosed shells, do not add soil to the enclosure. The soil will retain water and cause the roots to rot. Tillandsia do not like any substrate that retains water. For ease of care you can just add pebbles or sand to the enclosure.
Most tillandsia die from over watering. The smaller the terrarium, the less watering the plant will require. There is less space for the water to evaporate so the area retains water. The larger the terrarium the more water it will require because the water will evaporate quicker.
Watering
Under watering and over watering are issues with tillandsia. It is a delicate balance to correctly water your plant. If the plant leaves curl or roll under, you have not been watering it enough. If the bottom of the plant looks moist and brown you are probably watering it too much.
Try to keep your plant looking “happy.” If you do, then you’ll know you have a well watered plant.
If you choose to put tillandsias outside in the summer, put them in an area with filtered, indirect sunlight. Remember they are native to the rain forest where they do not get direct sunlight.
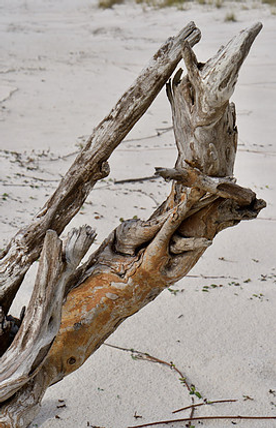
Anchoring Bromeliads on Driftwood
Driftwood is an ideal anchor for an bromeliads. It looks lovely placed on a coffee table or sideboard. BUT BEWARE! You do not want to find a piece of driftwood by the beach and use it straight away. You need to first prepare the wood.
1. Soak the driftwood in room temperature water for 24 hours to remove the salt.
2. Rinse the driftwood well and allow it to dry completely.
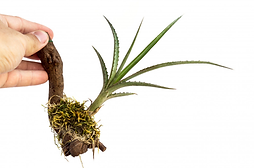
Selection of Bromeliad
Select a bromeliad with a small crown of foliage and a large stem. There are many varieties to choose from. Numerous bromeliads have naturally small cups between the leaves which make it easy to water. DO NOT choose a top heavy plant, because you do not want it to topple over causing young roots to tear and die.
Wrapping the Bromeliad
Wrap a medium such as sphagnum moss or coconut coir husks either to the root/stems of the plant or to the actual wood using staples, silicone glue, jute, bonsai wire or fishing line. Refer to What is an Epiphyte for more information on mediums.
If you wrap the stems of the plant with the medium, attach the plant onto the driftwood using only the stem/roots and medium. Do not attach the plant by its foliage. Secure it using twine, or one of the materials mentioned above.
If you attach the medium to the driftwood, gently attach the stems of the plant to the medium using twine, etc.
In order to camouflage the material you used to anchor your plant to the wood, glue some extra sphagnum moss on top of the wire or twine. Use an acid free glue produced by Lineco. (Purchase this at Amazon).
Vertical Support:
If you’re using a vertical support for your bromeliad, follow the above directions for anchoring it to the support. Choose a small crowned plant and anchor it securely to the wood. You do not want it to move while it’s developing its roots.
Taking Care of Your Bromeliad
Watering:
High Moisture Area
Bromeliads are tropical therefore thrive in humidity. Place your plant in a high moisture area of your house like the bathroom (if there is a window) and/or kitchen. Do not place them near a heating element.
Submerge the plant into lukewarm water as described above every 2 to 3 weeks. If you see the leaves are curling or rolling under or if they fold together, or the outermost leaves turn brown, you may have to mist it or drench the medium with water. Wait until the medium dries out between watering.
Low Moisture Area
If the plant is NOT in a high humidity area, mist the plant in the mornings 2 to 4 times a week. Also saturate the growing medium when it appears dry.
A pressure sprayer is a good gadget to have on hand if you have a bromeliad. Fill the container with water, pump it a few times, then hold down the sprayer to add humidity to the area. A good pressure sprayer is the Plant Care Pressure Sprayer by Vivoson.
Type of Water
You must be careful with the type of water you use for your bromeliad.
-
Do not use softened water. The salt will build up on the plant leaves.
-
Do not use distilled water.
-
Use tap water, but let it sit out for 24 hours so the chlorine dissipates.
-
Another alternative is pond water or aquarium water. Do not fertilize the plant if you are using this type of water.
Fertilizer:
Bromeliads will benefit from fertilizer. Fertilize in the spring during growing season and while it is maturing to its full growth. Fertilizing will not only aid in growth but in the plant’s ability to produce flowers. After it has matured, fertilize the plant once a quarter with a water soluble indoor plant fertilizer. Use a water soluble fertilize at 1/4 of the recommended strength.
You can add the fertilizer to the regular watering regimen.
Light Requirements:
Bromeliads enjoy filtered light. Place your plant in a south, east, or west facing window area in the northern hemisphere (opposite in the southern hemisphere), about 2 to 3 feet away from the window. NO DIRECT SUNLIGHT.
You can supplement the light your bromeliad receives with a table top artificial light if you feel your plant is not getting enough sunlight.
Some Examples of Bromeliads
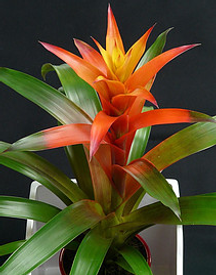
Vriesea
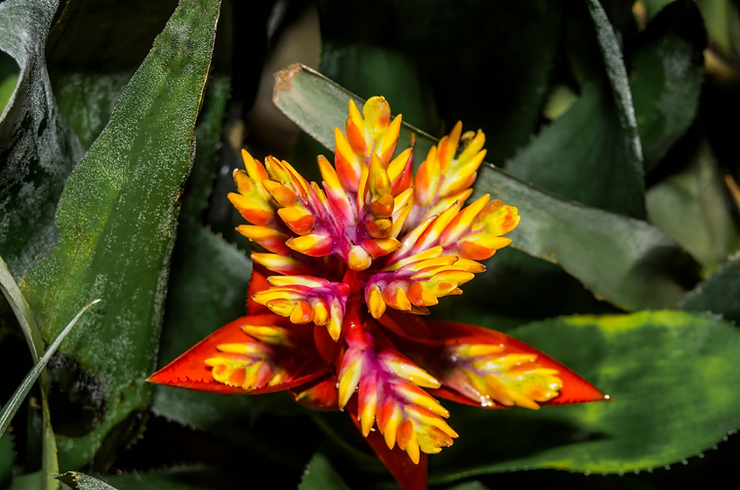
Vriesea prefer bright light. They have a natural reservoir in the center. Add water directly into the cup. Allow it dry between waterings.
Neoregelia
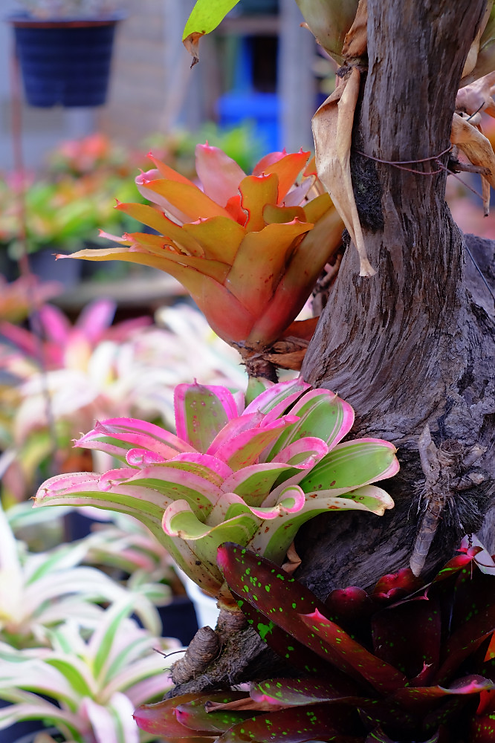
Neoregelia prefer medium to bright sunlight high moisture area, and infrequent watering. It will survive with little care.
Guzmania
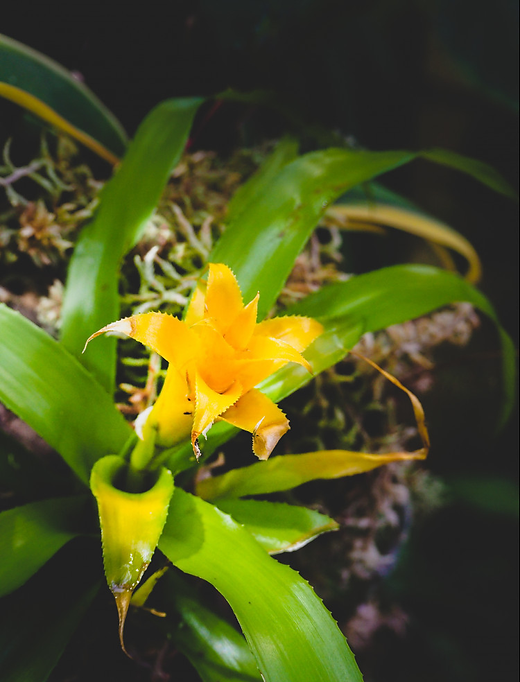
Guzmania likes medium light. Water it occasionally. It prefers high humidity and fertilize it once a month.
Final Tips on Bromeliads
Bromeliads are easy to grow. Here are a couple more tips to keep your plants looking bright and happy.
1. Position your plant away from cold and hot drafts.
2. Cut off dead or brown tips at an angle with good shears.
3. Pull off any dead leaves from the base of the plant.
4. Keep your plant cozy in an environment that has adequate moisture and is between 50 and 90 degrees F. (10 to 32.2 degrees C)
How to Grow Bromeliads – Summary
These unique little plants can bring much beauty to your gardening experience. Do not ignore them even though they are epiphytes. Supply them with water, nutrients, and a supportive platform and they will provide you with many years of joy.
I hope you learned something from this post. Please share it with others and comment below. I’d love to hear from you.
Happy Gardening!